In this article, you will learn what a task is and how to populate them into Onfleet (without using the API).
- Create a Task Manually
- Edit or Delete a Task
- Clone a Task
- Edit Task Completion Status
- Create a Task From the Map
- Import Tasks
- Importing International Phone Numbers
- Scheduled Imports
- Task Statuses
- Downloadable Import Sheets
Create a Task Manually
A task is the core unit of work to be completed by drivers (ex: a pickup OR delivery). To create a task manually, click the + button in the toolbar and select New Task… or use the keyboard shortcut T. You can also create a task from the map.
A window will appear with required fields to designate a recipient (or none), the type of task (dropoff or pickup), as well as a destination. Optional fields such as recipient notes, task details and a delivery time window are also available.
Recipient
If the task includes a recipient, the name and phone number are required. If this recipient has been created before, the phone number will be recognized and the name and notes will fill automatically. To remove a recipient, suppressing all notifications for this task, simply check the box labeled No recipient.
Recipient notes should be used for specific instructions that apply to all tasks for this recipient ie: door codes, special drop-off locations, warnings, etc. Recipient notes will remain attached to this recipient and will appear on all their tasks until overwritten or deleted.
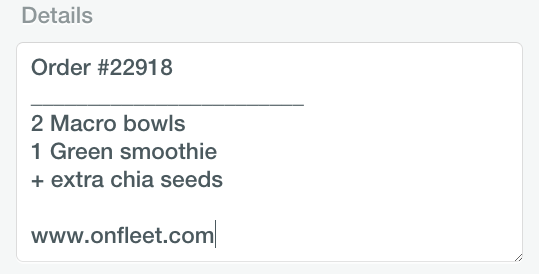
Details
Optional details can be added to describe the work to be performed, the items to pickup/deliver, or even a link to an external document, website, or app.
Destination
A destination address must be entered and selected from the available drop-down options. If your address cannot be found or is invalid, you will need to correct it and select from the drop-down to continue.
Note: Only addresses with a street name and number are considered valid. Addresses without a street name and number or more generally described (e.g. "Pier 4") will not be accepted.
Geocoding can be skipped during task creation by entering coordinates for the task destination in the dashboard and on task import sheets. Destination details must be input to be displayed to drivers and dispatchers, however, they aren't used in geocoding.
Alternatively, you can also create a task from a specific location on the map. Destination coordinates will be captured through the map at the exact location where the task has been created.
Time Window
If your tasks follow a schedule or you have provided an estimated fulfillment time to your customer, use the time window section to establish a Complete After and Complete Before time.
Route Optimization Constraints
Note: You must enable Route Optimization to see and use this feature. For more information- check out this article.
Optionally, you can specify a task's quantity and individual service time to be considered during route optimization. See Define a Task's Quantity and Service Time.
Assignment
Assignment of the task to a driver (or a Connected Organization) can be performed now, or you can do it after task creation via the sidebar or map.
Edit or Delete a Task
You can edit all attributes of a task until it has been started by the assigned driver, and most attributes can also be edited after the task has started (with the exception of the phone number and address). To edit a task, simply double-click it in the sidebar (or on the map), and click the Edit button.
Delete a Task
Tasks can only be deleted if a driver has not started the task yet. Deleted tasks will be immediately removed from the dashboard and driver app, and once deleted the task can not be recovered. Tasks can be deleted in several ways:
Sidebar Selection
Select the task you would like to delete from the sidebar, right-click the task, then select "Delete".
Delete from Task Window
Double click the task from either the sidebar or the map view, then select "Edit". Once you have opened the task window, scroll down and select "Delete".
Delete all Uncompleted Tasks (Advanced Users Only)
If you would like to delete all tasks which are uncompleted (both unassigned and assigned for all time) you can do so from within the Admin account by using the keyboard command: CTL + ALT + SHIFT + C
Clone a Task
To create a new task with all the same details as another task, right-click on the task in the sidebar to open the context menu and select the "Clone" option:
Alternatively, you can also open the task by double-clicking it on the map or sidebar and selecting "Clone" at the bottom left corner.
Note that the recipient and destination are always retained. Complete After/Before times are also carried over if that time hasn't already passed, and the task metadata and barcode fields will be checked by default if they are present in the task.
Finally, all metadata associated with the original task will also be carried over when that task is cloned. Your newly cloned task will appear in the unassigned section of the sidebar.
Edit a Task Completion Status
To edit a task's completion status, click the 'Status' field in any task that has been completed. Update the task completion status and/or failure reasons, and click 'Done' to make the change.
Once a task's status has been edited, the task timeline will then display the new entry with the name of the dispatcher that edited the status.
Create a Task From the Map
To create a task from the map, right-click on any location on the map which best corresponds to the delivery address, and select "Create a task here":
A window will appear with required fields to designate a recipient (or none) and the type of task (Dropoff or Pickup).
The recipient's destination coordinates will be captured through the map at the exact location where the task has been created. If you'd like to edit or verify the destination details, click the "Edit Destination Details" button below the destination coordinates. If a street address can be derived from the coordinates, it will appear here and can be edited further. Keep in mind that the Destination Details are for display purposes only and the coordinates will be used to place the pin and to navigate the driver.
Optional fields such as recipient notes, task details, a delivery time window, and assignment to a driver are also available. For a detailed walk-through about manual task creation through the dashboard, please see here.
If the recipient of a task you are creating has already been a recipient in the past, the fields will auto-complete based on the phone number you enter in the first field, once you de-select that field.
If you would like to update the recipient name associated with a phone number that you have already entered, you may do so. This will update that name within your Onfleet dashboard database for any instances of that phone number moving forward.
Import Tasks
Onfleet's task import allows you to upload large quantities of tasks in a batch rather than creating them one at a time through the dashboard. You can upload CSV, XLS, or JSON files.
Step 1: Create an import sheetIn order for Onfleet to import all the task attributes successfully, your file should contain at a minimum the required fields (highlighted red) found in the sample import sheet attached at the bottom of this article.
Make a copy of the sample import template, remove the same data and add your own. To get started go to:
- File > Make a Copy
- populate your data
- File > Download as ...
Required Fields:
The
field is used to indicate the name of the customer you are delivering to. This should be formatted as "FirstName LastName."The
field should include a valid, unique phone number for your recipient.The
field should include the street number (including letters, if any) without spacing, followed by a space and the street name details, including the full word form of the street type (e.g. "Street" instead of "St" and "East" instead of "E").Also required:
, , , andOptional Fields:
The
field should include an apartment, suite or any additional information about the address (this will not be used during geocoding).The SMS notifications for certain recipients. Set the cell value to if you would like the recipient of the task to receive notifications, and set it to to disable notifications for that recipient. If this field is not used, the task notification setting is defaulted to and a notification will be sent unless the Recipient has notifications disabled.
field allows you to enable/disable automatedThe
field is used to store information or special instructions pertaining to that particular Recipient. Text placed in this field will overwrite any existing notes.The this post for more details on utilizing Longitude and Latitude coordinates for Onfleet imports.
and fields allow you to use coordinates instead of an address to add a task. Although the address fields will still be required, the geocoding process will be entirely skipped and their data will be used for display purposes only. SeeThe
field is used to store task-specific information like an order number or list of items to deliver.The
field is used to designate if a given task is a pickup. In order to designate that a task as a pickup, you must input in the task's cell. If this cell is empty, or contains anything but , the task will be imported as a drop-off by default.The
field allows you to input a date and time after which a task should be completed. The field allows you to input a date and time before which a task should be completed.- Unix timestamp
- MM/DD/YYYY hh:mm A (Example: 12/17/2015 2:30 PM)
- MM/DD/YYYY HH:mm (Example: 12/17/2015 14:30)
- DD/MM/YYYY hh:mm A (Example: 17/12/2015 2:30 PM)
- DD/MM/YYYY HH:mm (Example: 17/12/2015 14:30)
The Connections). The name listed must exactly match the connected organization's name for the assignment to occur. If you are only assigning to your own drivers you do not need to use this field.
field is used if you are assigning tasks to other Onfleet registered organizations that you are connected with (seeThe
field can be used to immediately assign tasks upon import. This is useful if routing or assignment was planned outside of Onfleet (manually or via a third-party tool). The name listed in this field must match a driver's name in Onfleet for the assignment to occur. Tasks imported that have a Driver in this column will be assigned in the order listed on the spreadsheet.The
field can be used to immediately assign tasks to a specific team upon import. The team name listed in this field must match a team name in Onfleet for the assignment to occur. Tasks imported that have a Team in this column will appear as unassigned tasks within that team.The
field can be used to add service time to a task upon import.Step 2: Upload sheet and map columns to Onfleet attributes
To import tasks, click the Page button next to the Plus button.
in the window and select the file from your computer. Once uploaded, you will be prompted to map each column header with a corresponding attribute within Onfleet.
Error handling
If there are any issues with the data provided in your file, the system will alert you and provide a description of the errors. If you would like to correct these errors on your file before proceeding, click Back twice to upload the corrected file.
Note: For your convenience, the attached Onfleet Import Template (Unix) includes fields that will automatically convert your local date/time into unix time. Simply enter your desired date/time into the
and fields, enter your timezone's UTC offset and unix time will be generated in the and fields.Importing International Phone Numbers
While a direct API integration is recommended for any large delivery operation, Onfleet’s import feature is one of the most powerful ways to get a large volume of tasks into your dashboard prior to making that investment. With a simple .csv file and a few clicks, dispatchers can import thousands of deliveries and auto-assign them to drivers with ease.
As Onfleet powers deliveries for customers in 60+ countries, our powerful import tool is able to reliably handle any international phone number that your customers might provide. Having said that, the import sheet must have the correct phone number format. Let’s take a look at a few of these required parameters.
Accessing the Import Sheet
You can find an example import sheet here that outlines the basics of our import feature. With a basic .csv import, dispatchers can specify over 25 parameters within each task, which makes for an incredibly rich amount of information available to your drivers.
Importing the Tasks
Once the .csv is populated with your delivery data, that spreadsheet can be imported directly through your dashboard. Simply click the import button at the top right of your dashboard and the wizard will guide you through the process.
E.164 Phone Number Format
Onfleet recognizes all phone numbers that conform to the E.164 format within the International Public Telecommunication Numbering Plan. Essentially, this format specifies that all phone numbers can have a maximum of 15 digits including the corresponding country code.
International Country Calling Codes
Onfleet also recognizes International Country Calling Codes that can be found here.
Preparing The Import Sheet
Last, but not least, the recipient phone numbers within your spreadsheet must properly display all the required fields. For example, this is a sample phone number format for a Slovakian phone number: +421915426219
If you are using Excel to create your import, you will need to make sure the cells containing the phone numbers display the + for the import to be successful. There are a few ways to ensure the correct cell format, which are outlined below.
The first way to achieve this (see GIF below) is to apply a custom cell format with these steps:
- Highlight the column and/or cells that contain the phone numbers
- Click Format → Cells → Custom
- Type: +0 → Click OK
- You should now see the + displayed in front of the international phone numbers
Similarly, the second way to achieve this is to simply display text within the cells instead of digits
- Highlight the column and/or cells that contain the phone numbers
- Click Format → Cells → Text
- Click OK
- You should now see the + displayed in front of the international phone numbers
Changing the cell format can also be easily achieved in Google Sheets by performing similar steps:
- Highlight the column and/or cells that contain the phone numbers
- Click Format → Number → More Formats → Custom Number Format
- Type +0 and Click Apply
Scheduled Imports
You can schedule an import to recur according to a pre-defined schedule. To begin, simply select "task import.
from the final step of theAll the recipient, destination, and task data from the import will be saved for use in the scheduled import. Complete Before and Complete After timestamps will also be saved, however, the date used will necessarily be changed to the date of the scheduled import.
Setting scheduled import parameters
Once in the scheduled imports wizard, you will be able to configure a number of parameters:
- The name of the scheduled import. This will be used to identify your import.
- The date this scheduled import can begin.
- Once: The scheduled import will run on the date, then stop.
- Daily: The scheduled import will run every day starting with the date.
- Weekly: The scheduled import will run with the first day specified following the date.
The frequency of the scheduled import:
- On: The days of the week chosen for the weekly occurrence.
- The time and timezone the scheduled import will run.
Once you click
, a confirmation message will be shown indicating the import was successfully scheduled.View / Edit Scheduled Imports
To view existing scheduled imports, open the import wizard or use the keyboard command
. Click the button labeledDouble click on the import name to edit or delete, or use the
and in the bottom right of the list.Here you can update all the properties for the scheduled import:
Running Scheduled Imports
Once created, a scheduled import will run according to its schedule until deleted. Each run, the owner will be sent a confirmation of the scheduled import and its results:
The scheduled action <NAME> completed successfully.
This action will run again on <DATE & TIME>.
Tasks created: 202
Assigned: 202
Team assigned: 0
Error count: 0
Error Handling
Tasks not assigned to the expected driver: Verify the driver's name on the import file matches the driver's name in the dashboard. If mismatched, correct the driver's name in the dashboard to match the import file, or delete the scheduled import and create a new one with the updated file.
Email confirmation indicates "completeBefore must not be before creation time": Verify the complete before times listed in the import file occur after the import is scheduled to run.
Scheduled import has a status of "Stopped" in the dashboard: Verify that an owner is defined for the scheduled import and that your billing status is current.
Scheduled import has a status of "Error" in the dashboard: Contact Us
Task Statuses
Task status is displayed with a color in the sidebar, the map, and inside the task detail sheet as a map marker ("pin") or dot icon.
Unassigned: Task has not been assigned to a driver and cannot be executed. Unassigned tasks will appear in the top section of the sidebar and on the map as a grey pin.
Assigned: Task has been assigned to a specific driver and is available for execution. Assigned tasks will appear beneath their assigned drivers in the sidebar and on the map as a purple pin.
In Transit: Task is being executed with active notifications and recipient location tracking. In transit tasks will appear beneath their executing drivers in the sidebar and on the map as a blue pin.
Succeeded: Task has been completed successfully. Succeeded tasks will appear as a green pin on the map only.
Failed: Task has been completed unsuccessfully. Failed tasks will appear as a red pin on the map only.
Delayed Status
You can easily determine if a task or driver is, or will be, delayed by reviewing either the sidebar or map view.
Task: Task is unassigned or assigned, and the current time is after the gold dot on the top right corner of the task's icon.
time, or the ETA will put the driver at that location after the time. A delayed task will appear in the map and sidebar with a small
Driver: Driver has one or more tasks assigned to him/her that are delayed. In all statuses, icon will appear with a gold dot in the upper right corner. If active, the status text will display by how many minutes their current task is estimated to be delayed.